


The Dr. Dabber SWITCH is the first ever induction heated portable enail. Capable of powering through 80 full-temp dabs without needing a recharge, the Switch is convenient for dabbing anywhere around the house.
Dr. Dabber designed the Switch to be easy to use and more civilized and convenient than traditional dabbing methods. No more torches and timers - every dab is simple and perfect.
Dr. Dabber Switch Review Video
The Dr. Dabber Switch is heated by induction. This extremely fast and efficient heating technology is the magic behind the Switch's 80 dabs PER CHARGE.
Induction uses an electrical current in a coil inside the big glass top-joint to magnetically charge and heat the titanium induction cups.

The Dr. Dabber Switch Price: $399
Included with the Dr. Dabber Switch:
- Switch - Induction dab rig
- glass bubbler/bong attachment
- glass carb cap/dabber
- white ceramic lined induction cup
- black ceramic lined induction cup
- reverse action tweezers
- silicone dab wallet
- wall charger
- a box that doubles as a travel case
Additional Switch Accessories:
- Black Glass Bubbler
- Smooth Ceramic Induction Cup
- Quartz Induction cup
- Bubble Cap
- Ball Glass Bubbler
- Saphire Induction Cup
Dr. Dabber Switch as a dab-rig review
The Switch is an amazing around-the-house portable dab rig. It's great on a coffee table or a countertop. It's easy to use and easy enough to pass around - just be careful with that carb cap.
The massive battery power and easy to adjust temperature make the Switch a regular in my dabbing rotation. At ~80 dabs per charge, it's extremely reliable and relatively easy to clean and maintain.
The Switch has 25 different dabbing temperature settings while in advanced or crystal mode. Simple mode only has 5 - I recommend skipping straight to advanced mode.
The temp settings are not strictly temperature. The Dr. Dabber Switch does not have any thermal sensors in the induction well. The 25 different power cycles are pre-programmed by the engineers over at Dr. Dabber. I'm told these engineers actually dab!
With the basic ceramic cups, the Switch is ready to dab in less than 10 seconds. The smooth ceramic and quartz induction cups require the Dr. Dabber Switch to be in *crystal mode*.
Heat up time for Quartz and Smooth ceramic is closer to 17 seconds - well worth it in my opinion.
You can drop your dab into the induction cup before heating up the Switch, or you can drop your dab traditionally as the device comes to temperature.
"The Dr. Dabber Switch is so great as a dab rig that it doesn't even matter how bad dry herb mode sucks. I'd still pay the $400 without dry herb mode." - Troy from 420vapezone.
Maintenance between dabs in the Dr. Dabber Switch can be as simple as a quick Q-tip wipedown if your temps are low enough and you're using the smooth ceramic or quartz cup. Read more maintenance info in the Dr. Dabber Switch User Guide.
Dr. Dabber Switch as a Dry Herb Vape
The Switch has a dry herb mode. Notice the lack of adjectives. Dry herb mode on the Dr. Dabber Switch is not what I expected. It's *NOT* a vaporizer, at least not in the same semantic definition as other dry herb vaporizers.
The Switch's dry herb mode utilizes the same induction cups to apply heat via conduction. You pack the cup as tightly as possible with dry herb and go to town.
The result can vary. But I'll summarize.
- It's cleaner than smoke but dirtier than vapor.
- It stinks like smoke, but not *quite* as offensive.
- It has some of the tasty qualities of vapor, but definitely not all.
- It gets me higher than smoking or vaping.
I shared and tested the Switch in dry herb mode with nearly 40 friends. The smokers in my test group *mostly* liked dry herb mode. There were some smokers that strongly disliked it.
The vape users in my test group were harsher. Most of these testers only vape and dab - absolutely no combustion. The vape-purists disliked dry herb mode almost completely. There were only a handful of the vape-only testers that said they would use dry herb mode again.
I wish it were better - but I do find myself using dry herb mode once in a while. I consider it a better alternative than smoking and it's something I will reach to when I want that deep stony high.
Dr. Dabber Switch vs Puffco Peak
I'm making a dedicated video to compare the Peak and the Switch. It's not really a case of which dab rig is better; it's more like *which one is right for you*.
The Dr. Dabber Switch is more powerful than the Puffco Peak. The Switch can dab hotter, harder, and longer than the Puffco Peak.
The Puffco Peak is significantly smaller and easier to carry outside of the house.
Final Thoughts: Is the Dr. Dabber Switch worth $400?
Four hundred bucks is a lot of money. However, the Dr. Dabber Switch does a lot of things no other portable dab rig or enail will do!
The Switch will power you through 80 dabs without a torch or a cord, and each of them will be ready to roll in less 20 seconds.
The Switch can crank out two dabs before a traditional quartz banger is even fully torched.
It's expensive, but its worth it. Consider it an early adopter tax.
If you're only dabbing at your desk and not really needing the portability, you have a lot of options that will serve up better dabs and dry herb.


Thank you for the awesome review. Just a quick heads up, you are running on an older firmware. The cooling cycle does not activate after each heating cycle now. The cooling cycle will usually only activate after a cleaning cycle, and sometimes not even then. Please, email drdabber if you have any questions. Happy dabbing.
Hello!
Is it possible to get an evaluation of its power output?
As a universal IH driver it’s a bit expensive but lets consider such a tool might pave the way to alternative 3rd-party “Dry Herb” scenarios where conductive-mode “ovenization” has been replaced by a “packetized” mix of radiative/conductive heat vectors most compatible with a pulse-based consumption ritual. E.G. i’d concur the manufacturer’s solution obviously requires a fix and i’m even convinced this can be performed easily, economically and efficiently. It’s just a matter of matching numbers i guess, plus simple precision glassware.
So, actually i may want to keep an eye on that one, hence my curiosity and related commenting.
It’s got a learning curve with flower.
Its pure conduction so i pack my bowls tightly with finger torn weed, using the back end of the included forceps as a tamp.
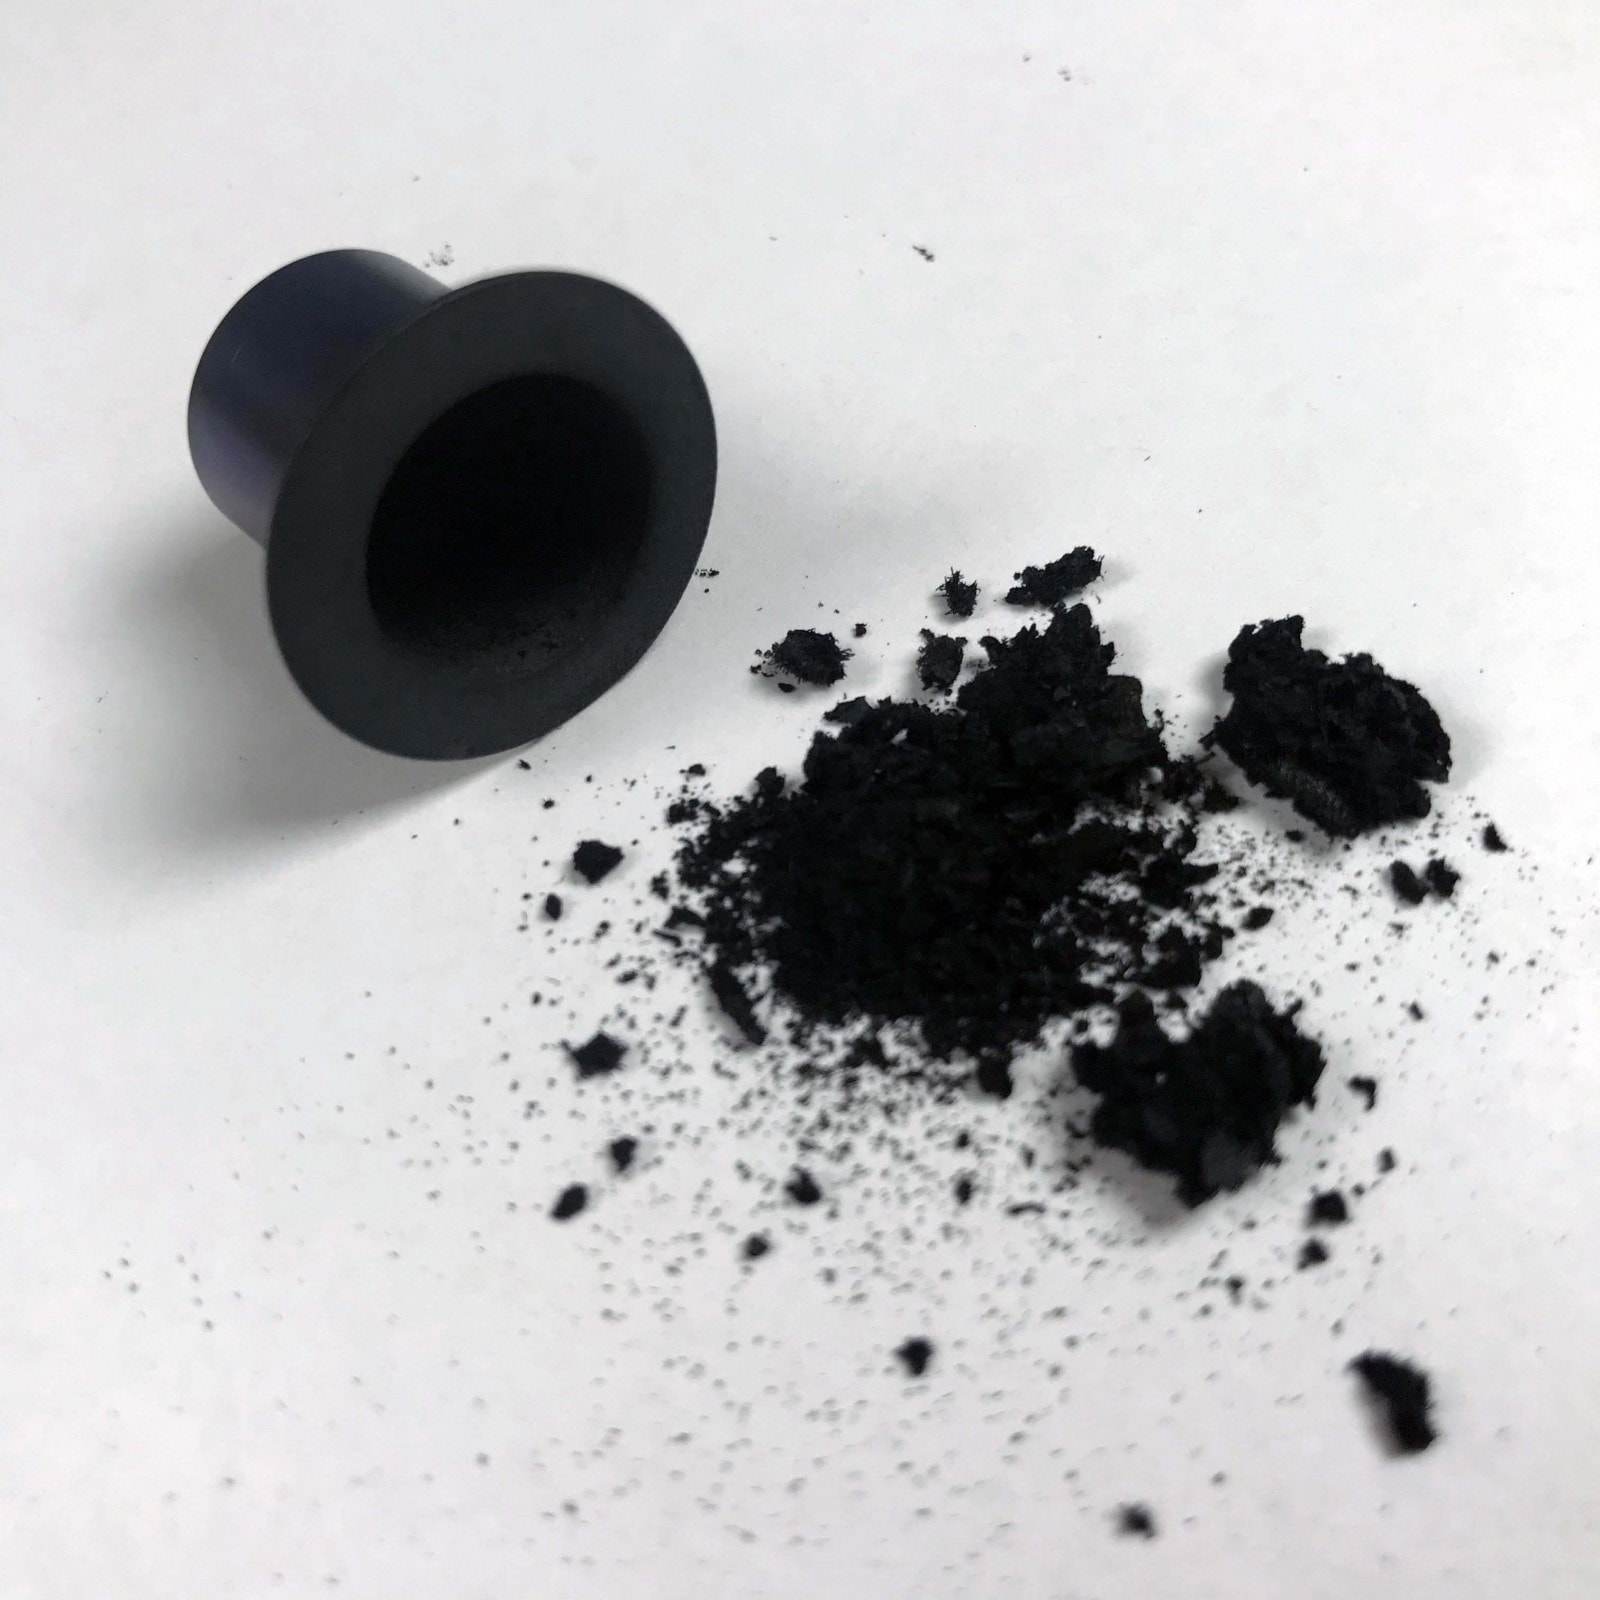
I start off around 550-600 degrees Fahrenheit and work up to 700 and in this temperature zone you get an effect called pyrolysis, basically turns your bud into a charcoal turd when its done with it, but its a STRONG extraction
The flavor with bud is lackluster, but the high is very very potent.
Remove the O ring that comes with its base carb cap and turn it inside out, then put it on the inside lip of the glass to make a seal between the heat chamber and the carb cap for good hits, the lower O ring is optional.
I also recommend a directional carb cap, they have a slanted air outlet hole, so i turn the carb cap until that hole is pointing directly at the bowl, then make small rotations, watching the vapor as it enters the glass to get the best hit.
Ive been using mine for herb and oil, and it’s been my daily driver for 2 years